|
Painting Demonstration
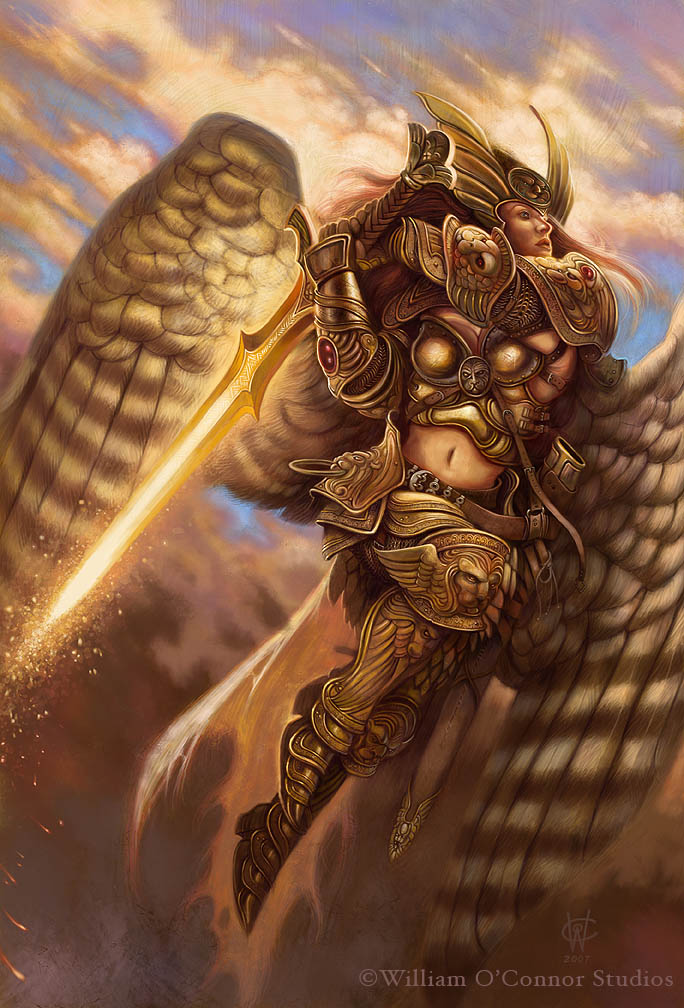
Aurora Angel
Welcome to my digital painting demonstration. I am constantly asked by students and fans how I do a painting so I put this together to walk you through an example. Its important to remember that there is not only one way to paint. Every artist paints differently, and the digital medium has allowed for an infinite number of styles to be used.
As with any technique, a student must have the prerequisites of drawing, color, composition and design in order for your images to be successful.
I use a MAC with Photoshop CS, and a Wacom Tablet. As you will see in this demonstration, digital painting has become a multi-media tool, utilizing photography, drawing, painting, effects brushes, stamps, and collage. I highly reccommend any student study the traditional form of all of these techniques to better expand your vocabulary as an artist.
 STAGE ONE: STAGE ONE:
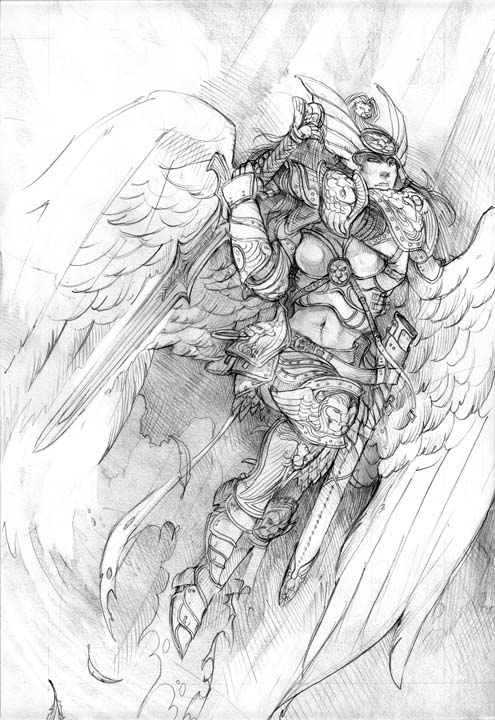
The Sketch.
Here is the completed sketch of the angel, rendered using pencil on paper, at about 10"x14". I try to work out as many of the details as possible at this stage. I then scan this image at 300 dpi grayscale. I developed a winged lion motiff that I felt reinforced the character of the figure. Over the years I have used a variety of medium for drawing, but today I use .05mm HB lead, (in a simple click pencil)and on the best drawing paper I have ever found. "Borden & Riley #32 Ledger Hammermill White". I buy it by the six-pack.
 STAGE TWO: STAGE TWO:
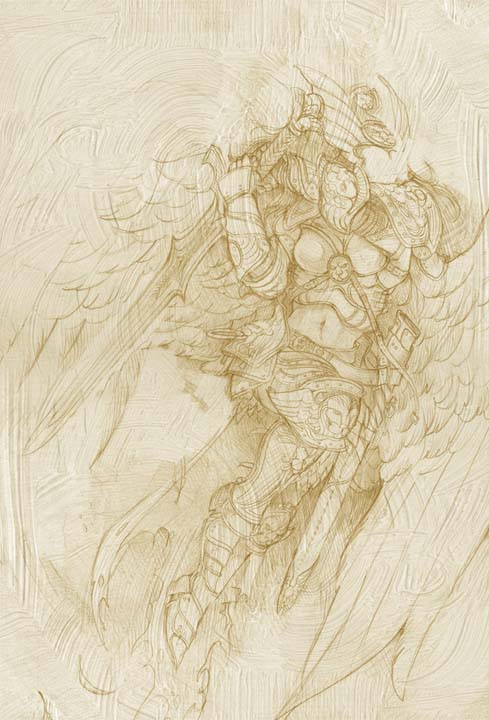
Assembling the Painting.
Working in Photoshop I begin to assemble my painting. I intend this image to be large and high detail, so I make it a 10" x 14" 300dpi image. I start by importing the drawing into a new RGB document and using Color Balance to shift the color to a sepia tone. Over this I import a scan of paint texture, from my library of textures, in a 50% Opacity, Multiply Mode Layer and also shift its Color Balance to sepia.
 STAGE THREE: STAGE THREE:
The Underpainting.
I approach my digital painting exactly the same way as I do my traditional work. Photoshop allows for the artist to work in infinite layers. I choose a value range within a single hue and paint a rough underpainting, establishing my light and forms in a 100% Multiply Mode Layer. Its at this stage, as it is traditionally, that I have the most fun experimenting with brushstrokes and textures. Even though I will paint over a great deal of this work, it will show through subsequent layers adding depth.
 STAGE FOUR: STAGE FOUR:
Color.
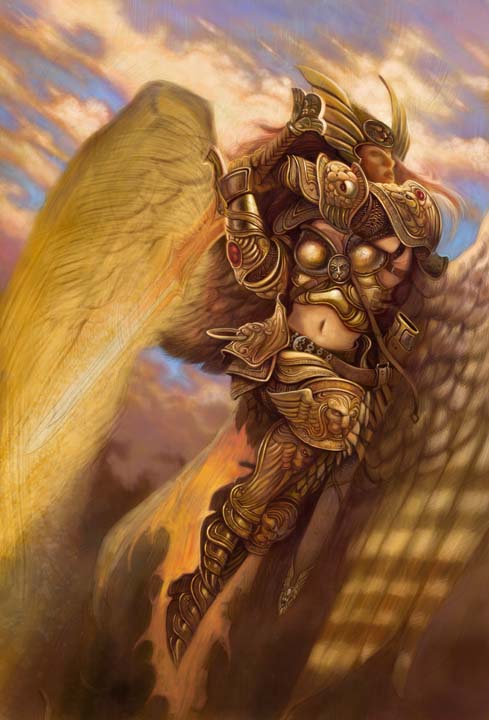
In a new layer (50% Opacity, Normal Mode) I block in the basic colors of the forms in the image. This is done roughly and quickly without any attention to detail. Its difficult for new painters not to try to paint ahead of themselves. Remember that an image must be brought up slowly. From the general to the specific. I like to use the analogy of a polaroid camera photo, slowly coming into focus. I know you want to paint all the details, they're fun! but you can't paint the fingernails until you get the hands right. Be patient. These rough steps allow for easy corrections and chages to be made early on. As you can see, a lot of changes were made in this stage. The rays of sun were eliminated, (too repetitive) and I included a patch of blue beneath the figure to show continuity in the background.
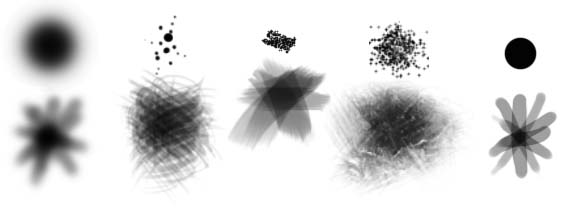 BRUSHES: BRUSHES:
Here I have included a swatch of some of my favorite brushes. These are shown basically, to these I can add texture, dual brush, jitters, or any of an infinite variety of subtle changes.
 STAGE FIVE: STAGE FIVE:
Background.
I generally work from back to front and dark to light. Starting with the sky in the background I paint it to nearly finished. This gives me a color and value range that I can work on top of that I know will not change. Reflected colors can be drawn from this background.
 STAGE SIX: STAGE SIX:
Fiddly bits.
Now its time to get down to business and start painting details. I create a 100% opacity Normal Mode layer. This is the part of the painting that takes the most amount of time, probably as much time as all the other steps put together. I work with a variety of brushes trying to give individual objects individual textures. In the end, I have about three or four favorites that I use in this stage. Most are pretty simple brushes trying to emulate brushes that I would be using traditionally. This stage nearly completes the armor of the figure.
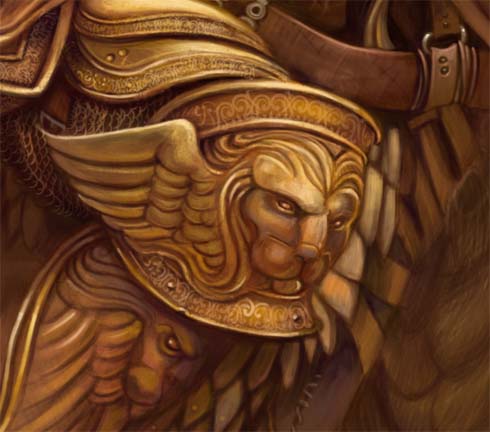 STAGE SIX-DETAIL: STAGE SIX-DETAIL:
Photoshop allows for very cool custom brush effects seen here. Dreading doing all the engraved inlay in the armor that I wanted for this painting, I made a custom brush instead. Finding a reference of ornament, I selected a section and saved it as a New Brush Preset. This allowed me to "paint" the inlay into the border. The chainmail as well is a similar custom brush. This only gives me a rough of the detail. It will still require me to work on top.
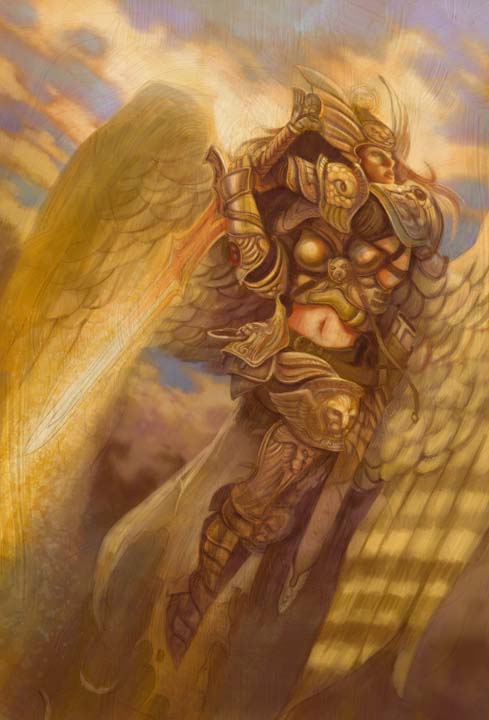
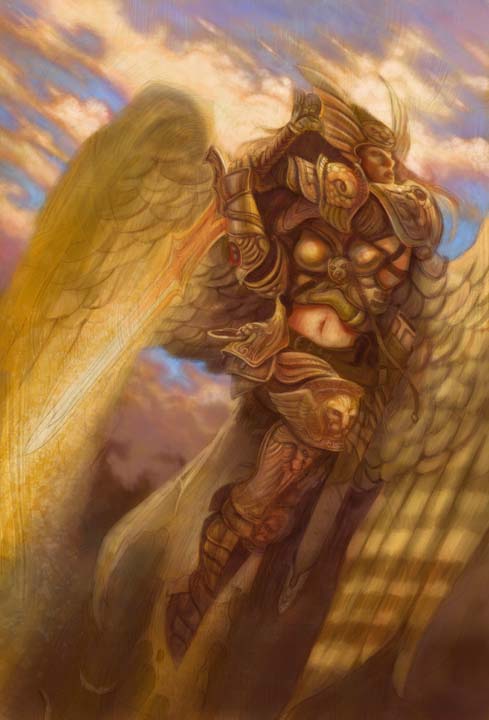
STAGE SEVEN:
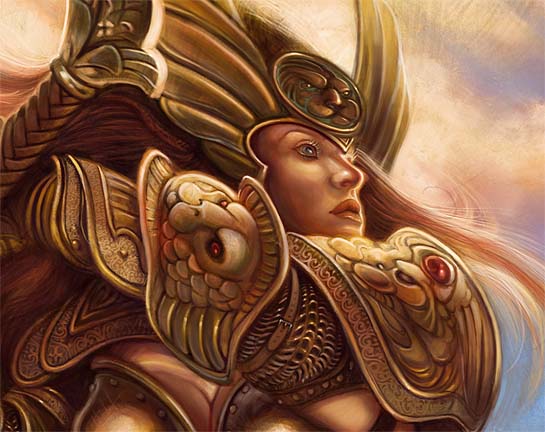
Finish.
Here we see the finished image with a detail of the face. A last layer of details is placed on top at 100% opacity, Normal Mode. This is so any blending or erasing can be done independently of the work beneath so that it will not become smudged or obscured. On top of this a last "glaze" layer of 50% opacity, Multiply Mode, and using a brush in Overlay Mode. This produces an effect very similar to an oil glaze in traditional painting. It nicely ties together the forms with a unifying color shadow.
In this detail, you can see how all the different stages and techniques come together. All the various brushes, the stamping effect on the trim, the incorporation of photo reference and texture is clear as well showing the various layers including the underpainting and sketch stage that still can be seen poking through in the sky and hair.
COMMENTS:
All total this painting was executed in probably about 40 hours. It was done as a personal painting so those hours were spread out over several months.
I hope that this small demonstration gives you some ideas about how to approach a digital painting. I am constantly amazed at what I discover using this amazing new medium. Good Luck, and have fun!
William O'Connor
Contact Information
To request autographs, commission information, or a portfolio send inquiries to:
 William O'Connor William O'Connor
PO Box 434
Scotch Plains, NJ 07076-0434
wocillo@comcast.net
|
|
|